Showing posts with label project. Show all posts

Wednesday, October 20, 2010

Instant Artwork

Now that Olive is old enough to color without eating the crayons it's one of her favorite things to do! I have all of these little canvas that I bought before for another project and didn't finish. Well, I found a way to use one of them! Simple kid art.

You just need some cute ribbon, glue, a canvas and media of your choice. In our case (where paint is still pretty messy) we just used regular crayons.
After she colored the canvas, I just glued the ribbon all around to look a little more finished.
easy peasy!

Tuesday, October 12, 2010

Toddler Table Redo


So, I was under the weather this past week and pretty much stuck in the house for awhile. I was going stir crazy and itching for a project. I found this one (among a few others that I will post later:). How could I have not thought of it before? My baby's toddler table totally needed a stylish makeover!
All I needed was some pretty spray paint, modge podge and some hip scrapbook paper...(and a small amount of patience)
..a few hours later and tah dah! a new table! I love it!


Monday, September 13, 2010

Transformation

I love watching beads transform into jewelry! I like to lay out the supplies first for orders so it's easy to just go down the line and make them one by one. Here is a life of a bead at harlow.

First, a tray of beads...
Then, they start to transform into necklaces...
And then chains are added....and here it is!
and more....
Off they go to the store to sit pretty and wait for someone to love them:)

Tuesday, July 27, 2010

Summer Projects!


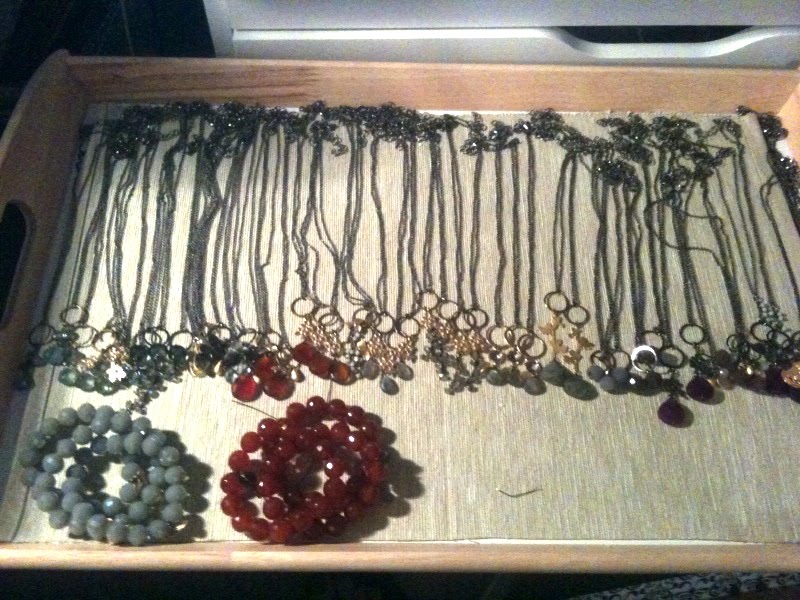
Here are some of the things I've been doing lately when I take breaks from jewelry making.. First, check out my new jewelry case I got from Presents of Mind (also the newest store to pick up harlow:) I just LOVE it! I'm making jewelry trays and jewelry display boards to fit perfectly in the bag to take to stores and shows. It even has a handle that expands and wheels so you aren't lugging it everywhere. Plus, it's harlow orange so how could I possibly resist?!


I've been turning these great multi-functional (great for so many things!) cork placemats into jewelry display boards by covering them with fabric and putting in a thin layer of cushion so that I can hold the jewelry down with pins...
...and turning this
into this! These trays have inserts with compartments that I can tote jewelry in. They don't have lids or anything so I needed to make some kind of strap to hold everything in.
I used velcro on the ribbon so that it can be secured tightly :)

Wednesday, July 21, 2010

Adorable DIY Totes!


So, I just recently discovered that I heart fabric paint...well, not in general I guess, but in this situation, I do. I happen to use tote bags - a lot! Especially with the baby and all the gear that you have to take around with you , it's a nice quick way to grab things and go. Plus, you don't have to match your outfit or anything..anyway, I wanted to make some gifts and what a perfect thing to try from my list of projects- DIY totes! I went to Michael's hoping to find some really cool stencils, and guess what??! Michael's does not have cool stencils - but the do have blank ones. I knew I wanted a lotus flower and a bike, so I googled images of both and picked my favorites. Then I just traced them, cut with my craft knife and voila! a cool stencil! I'm sure you know how to use a stencil, so the rest is history. I also found some letters at the store and monogramed each one with a first initial. Easy peasy totes!


click to enlarge

Monday, May 24, 2010

Adorable Tank Top DIY!

My friend JJ from Lovely Little Things 
posted this on her blog today about a plain tank top she added a ruffle to. How easy, adorable, and such a fabulous idea! 
I love how the back looks too!
Thanks for the idea JJ!

Thursday, May 13, 2010

I heart my sewing machine

I saw an orange pillow at Target last year and, since then, I have wished that I would have gotten it.  So I decided to make one myself. I wanted one to match a duvet cover for my bed that I LOVE and a pillow that could be used even when we don't make the whole bed - with shams and all. The stuffing needs a little rearranging, but I love the color and fabric! (it's a velvety soft fabric)

I didn't have any orange thread, so I decided to do a stitch around the outside so I wouldn't have an odd color to sew the part where the stuffing goes in.  My awesome new sewing machine (thanks Mom!) does a number of decorative stitches that were surprisingly easy to use. I chose a leafy vine stitch for this one...
ta-dah! 

Monday, April 26, 2010

New Project! - Bean Bag Cover for Olive


So, bean bags are pretty dorky and ugly (just sayin) but we wanted something for Olive to be able to climb into and hang out without risk of falling etc...So what better than a nice cushy bean bag? The problem is that a. no one really sells bean bags these days, and b. the ones we could find don't exactly go with our decor. So, I decided to just grab this one and recover it. I bought some really fabulous recycled felt today for the project. I envisioned more of a creamy brownish gray but they didn't have that, so I settled with a mossy olive green. I got tan, chocolate and orange felt as well to make flowers and leaves. It's pretty cute in my head, so we'll see how it turns out! Stay tuned for the results...